what is the call to install kitchen faucet
When it's time for a new kitchen faucet, your first instinct might be to call a plumber. Still, the reality is that faucet installation is quite elementary. For the average exercise-it-yourselfer, it's a task that takes a little know-how and an 60 minutes or two of piece of work. One time you've done it, you may be surprised at how easy the whole thing is.
This May Also Interest You: Replacing Faucets: What You Should Know
Our step-by-step guide volition tell you everything you lot demand to know near installing a new faucet in your kitchen.
Tools and Materials Needed
Of class, the most of import thing you demand before starting any kitchen faucet installation is the new faucet. You can pick out a kitchen faucet online or in whatever dwelling comeback shop. The entire process will be easier if you choose i with the same number and same-size holes as your old model, but it'south not technically necessary.
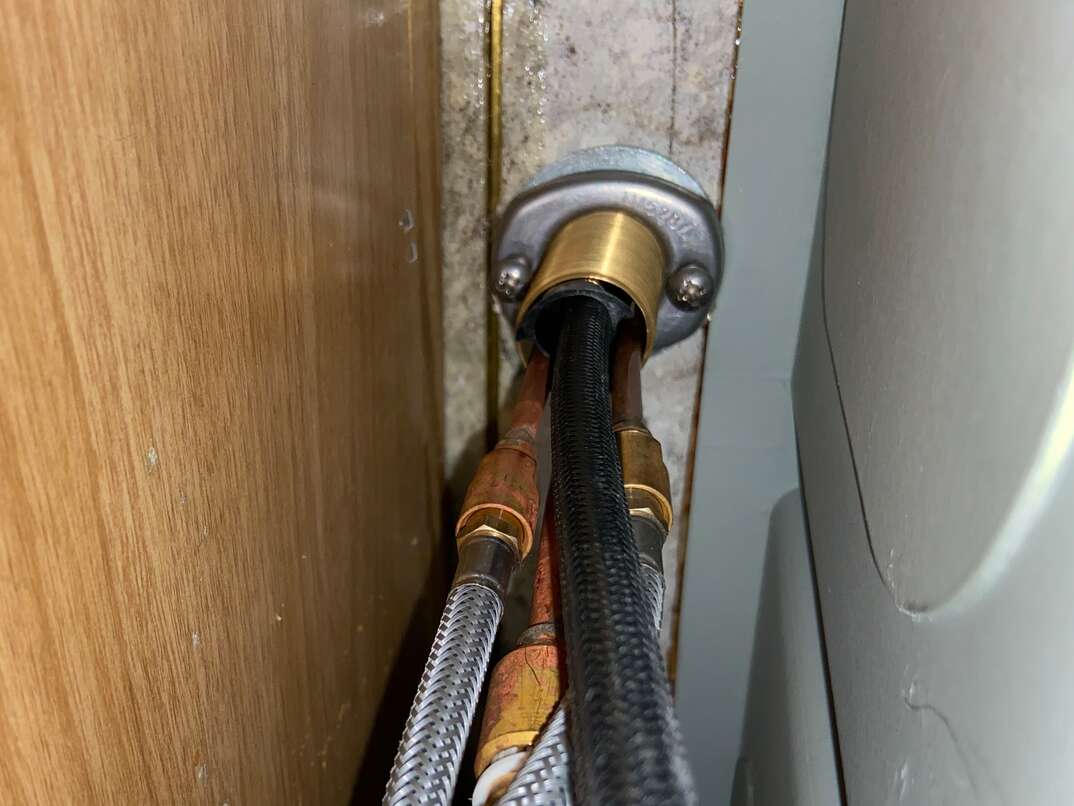
Side by side, take a look at your new faucet and your existing sink to see if yous take the proper materials for hooking everything upwardly. Some faucets have already-attached tubing on the faucet cease already while others will just hook up to standard tubing lines. If y'all can choose your tubing, most experts recommend braided steel supply lines, which are sturdy and flexible, and have leak-proof connectors already attached. Most sinks just need tubes measuring 12 inches in length and 3-eighths of an inch to a half-inch in diameter. Check your faucet and sink to make certain standard sizes volition work.
In addition to basic materials, be certain you have these tools:
- An adjustable wrench
- A pipe wrench
- A standard screwdriver set
- A bucket
- Erstwhile rags or towels
- Caulk (optional)
- Teflon record (optional)
- A flashlight (optional merely it makes things a lot easier)
- A basin wrench (may non be needed)
- A hammer (may not be needed)
- A pipe and tube cutter (may not be needed)
- A handsaw (may non be needed)
Tips for Installing a Kitchen Faucet
Here are six tips to continue in heed as you starting time your faucet replacement.
1. Pay Attention!
The nearly of import tip for installing a kitchen faucet is but to pay attention equally yous piece of work. This type of installation doesn't require any special skills or technical knowledge. Nonetheless, there are a lot of pocket-sized parts that must be assembled in the correct order to prevent leaks or other mishaps. Before y'all start, read over all the installation instructions that came with your faucet. If you lot're new to working with faucets, watch some online instructional videos from a source yous trust.
2. Prepare for Tight Squeezes
Once you become started, y'all'll quickly discover that the tricky part is just being able to achieve into tight places and plough diverse nuts and bolts. If possible, invest in a basin wrench to brand this chore easier.
3. Cut It Out
Another tip for saving on time is cutting out your old faucet. If you aren't planning on using your leaky faucet again, you can just cut through assembly parts to pop it right off your sink.
4. Go the Picture?
If yous're worried near being able to reattach everything properly, consider taking a photo earlier you start. This can help you remember the original plumbing configuration.
5. Mind the Gaps
To prevent leaks, utilize caulk under the faucet plate and Teflon record around the supply-line connectors.
6. Save the Instructions
Once yous're all done, be sure to salvage all the parts and instructions. Collect them in a freezer bag and hang them under your sink. This way, yous'll be able to easily refer to the instructions or get extra parts in case anything goes wrong.
Safety First!
In nigh cases, a faucet installation is fairly straightforward. However, that doesn't mean it'southward entirely risk-free. In that location are a few potential issues you can run into. To protect yourself and your home, make sure y'all follow our safety advice:
- Every faucet is dissimilar, so when in doubt, refer to the manufacturer's instructions for installation.
- Expect some dripping during the procedure; have a bucket and rags handy to catch any leaks.
- If you have a garbage disposal, exist sure to turn off the power before working on your faucet. Double-check that the power is off by flipping your disposal switch one time you've powered information technology down.
- Turn off the water to your sink to avoid whatsoever unpleasant leaks.
- Wear rubber goggles to continue any old sink water or random droppings from dripping into your eyes while you work underneath the sink.
Step one: Turn Off Water and Power
Now that y'all know a bit about how the whole process works, let'southward get started. We already mentioned it in the safety tips section, just it bears repeating: The very commencement affair you lot need to do is turn off the h2o and power down your garbage disposal.
For about sinks, turning off the h2o is every bit uncomplicated equally twisting the water-shutoff valves underneath your sink. They tin can stick a piddling, and so give them a small wiggle if necessary. Even so, if your kitchen doesn't accept individual shutoff valves, you may need to plow off the water to your whole firm while you install the kitchen faucet. Yous can practise this by going exterior to the water principal and turning the lever or twisting the large knob.
Once your water is off, turn on the faucet and let it run until h2o no longer comes out. That ensures your supply lines are by and large empty.
Step ii: Disconnect Your Supply Lines
Now, it'south time to remove the old connections if you haven't done and then already. Starting time by detaching the supply lines from the hot- and cold-h2o valves, which is simple plenty: Just use your adjustable wrench to turn the nuts counterclockwise. While doing and then, hold firmly onto the pipage itself. Don't yank on it as well difficult, every bit that can cause leaks in your plumbing connections. Expect some light dripping when y'all remove the supply line connections. (Correct now would be a cracking fourth dimension to have a towel or rag handy.)
If your old faucet was a style with pre-attached tubing, y'all've completed step two. Even so, if the supply lines also hook upward manually to the faucet, yous may need to remove those, as well. But like at the base of the supply line, disconnecting information technology just involves twisting the mounting nut counterclockwise. Because these nuts are positioned in a tight space behind the sink, y'all may want to use a basin wrench to get a firmer grip.
Step iii: Remove the Old Faucet
If you nevertheless have the instructions for your outgoing kitchen faucet, check them for tips on how to remove it. However, you needn't worry if you don't have these instructions. The steps to remove a kitchen faucet are essentially the same regardless of what faucet yous have.
Kitchen faucets typically have posts that run through the holes in the sink, and then a nut or some other type of mounting fastener volition screw into the faucet to hold it in place from the underside. To remove the faucet, all y'all have to do is take the fasteners off the underside of the sink and then lift away the faucet. These fasteners may exist corroded, which tin can make the task more difficult. Consider using a corrosion cleaner on the faucet, or a rotary saw to cut through the mounting equipment.
Keep in mind that there may be caulk holding down the faucet, or in that location might be gummy gunk underneath the mounting plate. It's normal to have to pull slightly to movement the faucet. However, if your faucet is yet stuck afterwards a light yank, bank check to see if y'all've missed any fasteners.
Step 4: Slide the New Faucet Into Place
With your sink fully prepared for faucet installation, it'due south now fourth dimension to guide your new faucet through the mounting holes. Expect carefully at your new faucet to see how it should be installed. With the single-handle faucets that are trendy right at present, you lot typically put an escutcheon plate over the holes on the side and only slide faucet components through the middle mounting hole. Yet, if y'all're using a faucet with separate handles, you may slide the hot-h2o handle gear through the first pigsty, the master faucet through the middle hole, and the cold-water handle through the tertiary pigsty.
Once y'all've threaded whatsoever pre-attached lines or mounting hardware through the holes, your faucet should await consummate from the acme. Brand certain everything is exactly how you lot want information technology to wait before fastening it in place. Keep in listen that this can be a little trickier than replacing a bathroom faucet, simply because kitchen faucets are and so big. It might exist best to ask someone to help you agree everything in place until you can get it screwed in properly.
Stride v: Secure Your Faucet
Now, follow the manufacturer's instructions to secure the faucet to the underside of the sink. Some faucets may have nuts you have to tighten on to bolts with a wrench. However, well-nigh modern faucets use oversized plastic wing basics. Y'all tin typically tighten these with your fingers, making the process a little easier.
When tightening your faucet connections, you lot need to recall to pay attention to what's happening on elevation of the sink, as well. There'due south the potential risk of your faucet getting turned to the side or your escutcheon plate twisting at an angle while you tighten the connectors. Therefore, it'due south a good idea to employ all your connectors loosely at first. Once everything is held loosely together, hold your faucet in place while you finish tightening it up.
Step 6: Attach Sprayers, Weights, Pull-Downwardly Lines
Another factor that makes this process different from learning how to replace a bathroom faucet is that almost kitchen faucets take extra lines connecting sprayer attachments. These attachments assistance add versatility to a kitchen sink, so almost all faucets will include a sprayer. This pace tends to vary a little more, depending on what brand and fashion you lot accept.
Some faucets may have a hose that clicks into place on a carve up sprayer. Others might have a pull-down sprayer that's part of the principal faucet. Oftentimes, sprayers accept a modest weight hung on their line; this donut-shaped weight must be placed on the line earlier connecting supply lines or information technology won't work properly. Simply follow the manufacturer's instructions and brand sure your sprayer is all connected before proceeding with supply line attachments.
Step vii: Hook Up Your Supply Lines
With all your faucet components in place, you can attach your main water supply. If your faucet did non come with supply lines fastened, start past attaching your supply lines to the faucet. Adding Teflon tape around the connectors tin aid reduce the risk of leakage afterwards, and then it's a proficient idea to use information technology if you have it. Once the top is connected, go ahead and claw upwards the supply lines to the water supply.
After this stage, you can turn your water supply back on. First, make sure your faucet is in the off position. So, slowly twist the supply line knob, taking care to support the h2o pipe with your other mitt. Avert cranking them all the fashion open up speedily. Instead, only exercise a half-turn or then before checking for leaks. Look on both ends of the supply lines, around the base of the faucet, and effectually the sprayer connections.
Step 8: Affluent Supply Lines Before Turning On the Faucet
Not all tutorials on how to change a kitchen faucet mention this step — but it's still essential. When your water supply is shut off for a flake, pocket-sized pieces of corrosion or debris can chip off. In the starting time minute or so of your water running again, at that place may exist a little buildup. This debris can terminate upward clogging the tiny holes at the tip of your kitchen faucet. Therefore, it's a good idea to flush your supply lines earlier actually using the faucet.
Remove the aerator from the end of your kitchen faucet, if possible. Some faucet replacement kits may have a special tool to do this. Turn the handle to run your water at full speed. Let information technology run for a minute or two before shutting information technology off. Then you lot can replace your aerator and use your kitchen faucet usually.
With the higher up guidance, you lot should exist able to become your new kitchen faucet up and running in no time at all. However, plumbing issues that you can't handle yourself will almost certainly come up up at some point. That's where coverage from HomeServe can exist useful. Our plans help cover the toll of repairs upward to the benefit corporeality, so yous don't take to stress over unexpected major expenses. When you phone call our 24/7 emergency repair hotline, nosotros'll help you schedule an appointment with local plumbers to prepare the trouble equally shortly equally possible. For peace of listen, check out plumbing plans from HomeServe today.
Source: https://www.homeserve.com/en-us/blog/how-to/install-kitchen-faucet/
0 Response to "what is the call to install kitchen faucet"
Post a Comment